
Monitoring Modbus Industrial devices using Ubidots - A Quick Start Guide:
Ubidots is a simple yet powerful IoT platform that any business can quickly implement. This quick start guide is for engineers to get their Modbus devices wired up, collect the sensor data and remotely monitor in Ubidots using the dual SIM FATBOX G3 Industrial IoT gateway.
What You'll Need To Get Started
-
1 FATBOX G3 Ubidots IOT Starter Kit
-
1pc FATBOX G3 – Dual SIM Industrial 3G Gateway with Ubidots IoT client and Modbus RTU & TCP server
-
1pc Digital input module – 4 x digital inputs (or switch contacts) Modbus RTU slave unit
-
1pc Analog input – 2 x analog input Modbus RTU slave unit
-
Wires to connect the FATBOX G3 to the Modbus slave units (0.3m)
-
2x 24VDC power supply 100-240VAC – 1 for FATBOX G3 and 1 for the 2 Modbus slave units
-
1x cellular antenna (2m wire length)
-
1x temperature sensor (0c - 400c) with 1m wire
-
Learn More: Click Here
You will also need the following
-
1 x micro SIM card with 3G/4G data enabled – please also get its APN setting from provider.
-
optional: Test switches or load (max 230V 8A, e.g. a 12V indicator) if there is no field equipment ready.
Note: As per writing, you can start with a free version of Ubidots to help with testing your concept. Click here to get your Free Ubidots Account

The Temperature Sensor
You can get more information on the temperature sensor here.
You can also access its data sheet here.
Collecting non-Modbus interface devices
For collecting data from non-Modbus interface devices, LUA or BASH scripts can be easily written to poll any data that is accessible over Ethernet or RS-485/232 interfaces. The data can then be put into a JSON format that can be processed by the Ubidots IOT platform.
Let's Get Started:
1. Design
It’s usually good practice to start by mapping out the devices you want to monitor, e.g. a switch or a sensor in a network diagram.
Later, you can move on to your own field devices like power meters or PLCs.
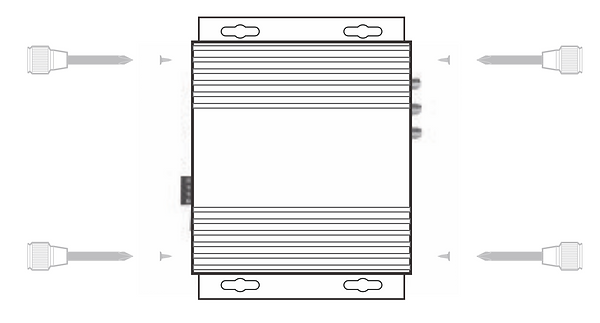
2. Wire Up
This section describes how to wire up the Modbus-485 I/O modules included in the starter kit to the FATBOX G3 and also to its 24VDC power supply. It will also show you how to wire up the temperature sensor to the analog Modbus module. The following are simplified wiring diagrams for the Novus Automation I/O modules but please refer to details in the instruction manual download links.
In your starter kit, a temperature sensor is pre-wired to to the Digirail-2A analog module to facilitate immediate testing of transmission of field data to your Ubidots platform.
Before you begin wiring, make sure to insert the an active SIM card into the FATBOX G3:
1. Dismantle the casing cover and slide out the PCB. Avoid touching the electronics, handle the board by the edges.
2. Insert your micro SIM card into the SIM card slot. Push the metal latch left/right to lock/unlock. Reassemble the metal casing.

Once the SIM card is in and the gateway is assembled you can proceed to wiring up the sensor and modules to it.


3. Setting Up The FATBOX G3
3A. Log into the FATBOX web console.
When you have connected up the FATBOX [ETH0 port], log into the web console [192.168.1.1].
By default the username is admin and password is fatbox12345
3B. Configure the cellular 3G settings
Go to <Cellular Settings>, and enter in the APN details you got from your SIM card operator.
Then to confirm the settings, click the UPDATE button.
3C. Reboot the FATBOX to save your 3G settings
For the cellular settings we also want to reboot the FATBOX G3 to ensure that it is saved. Go to the <Management>, scroll down and select the option to reboot.
3D. Ensure the FATBOX G3 is connected to a cellular network
You can now do a quick & easy test here to check that the FATBOX G3 is connected to the 3G network.
To do this go to the <System Status> Tab and scroll to the bottom and click the button that says "PING TEST"

If it returns the status "OK", congrats you are connected to the Internet!
If the status returns as "FAIL" repeat steps 2B & 2C to ensure that you have entered in the right APN details. If that is correct but you still do not get an Internet connection, please contact our technical support at: support@amplified.com.au

Next click on the "JSON DATA" link (see above). This will open up in a new tab in your browser with the latest JSON message string collected by the G3.

If you see a JSON string similar to the one above it shows that your G3 is successfully receiving data from your sensor, congratulations!
[You can skip to Step 4].
3E. Troubleshoot 1: Issue with wiring
If you see an error message like the one below go back and check on your wiring set up again.
Repeat step 3D when you are done. If you get the JSON string similar to the one in step 3D, it shows you are successful in receiving data from your sensor!
[You can skip to step 4].
If you continue to get an error message, contact our sales support team at: support@amplified.com.au
3F. Troubleshoot 2: Issue with Port Settings
If no data appears in the new browser window (opened in Step 3D), follow the troubleshooting steps below:
Go to <Port Settings>. Ensure your serial port parameters are configured as follows:

Remember to confirm the settings by clicking the UPDATE button.
Repeat step 3D in this guide to check whether your G3 is now collecting data from the sensor. If you still do not see any data or message, continue with the following steps.
3G. Troubleshoot 3: Problem with iotasset.txt file
The FATBOX G3 has iotasset.txt preconfigured to work with your Modbus temperature sensor, specified as following:
MBM_START
TYPE,R
ADDR,1
MBFC,3
REGS,8,1,UINT16HL
Key,4C_IN1
TYPE,R
ADDR,2
MBFC,3
REGS,14,1,UINT16HL
Key,2A_IN1
MBM_STOP
Please refer to our FAQ for more detailed write up for the iotasset device register.
To configure the iotasset.txt file to your device, please refer to our Modbus User Guide.
If it is overwritten, you have to copy the iotasset.txt to the FATBOX's /user directory via SCP.
To do that you can download this 'iotasset.txt' file onto your computer.
For MAC users
Open a terminal session and run the following commands:
> cd <folder where you saved the iotasset.txt> i.e."cd documents"
> scp iotasset.txt root@192.168.1.1:/user
> enter in the password for your G3 [default is fatbox12345].
You can run the following commands to check that your iotasset.txt is loaded:
> ssh root@192.168.1.1
> enter the password.
> cd /user
> ls [check to see if there is a iotasset.txt file in the list]
> cat iotasset.txt [verify the contents of the iotasset.txt file]
Go to the <Management> tab to REBOOT the G3 to save your settings.
For Windows Users
Go to the <Management> tab in the G3 web configuration menu. Enable the SSH option (see blow) and click the UPDATE button to save your settings.

Next run the Winscp and connect using the following File Protocol
> SCP Hostname: 192.168.1.1
> User/password: root/fatbox12345
> Drag the iotasset.txt file over to the /user directory
You can run the following commands to check that your iotasset.txt is loaded:
> ssh root@192.168.1.1
> enter the password.
> cd /user
> ls [check to see if there is a iotasset.txt file in the list]
> cat iotasset.txt [verify the contents of the iotasset.txt file]
Go to the <Management> tab to REBOOT the G3 to save your settings.
Repeat step 3D in this guide to check whether your G3 is now collecting data from the sensor. If you still do not see any data or message, please contact our technical support at: support@amplified.com.au
4. Setting Up Your Ubidots Report
We have integrated and tested Ubidots client into the FATBOX G3 gateway. You can securely collect data from remote industrial devices like MODBUS RTU and TCP power meters, PLCs or sensors. The FATBOX G3 with serial RS-485/232, Ethernet and CAN Bus is a flexible and robust LTE and 3G I(IoT) field gateway for your Ubidots remote monitoring solution.
4A. Obtain your Ubidots Token
-
Log into your Ubidots account.
-
Go to <Users\Organizations>.
-
Create a new organization by pressing the plus (+) icon located at the upper right side of the platform. Enter the organization once it gets created.
-
Go to the <Tokens> tab to create a new token pressing the plus (+) icon. Assign the token name of your preference, and press ACCEPT.
-
Copy the token created.

4B. Set Up the FATBOX G3 IoT Client
-
Now, login to your FATBOX G3 and go the <IoT Clients> tab.
-
In the ‘Client Setup :: Ubidots’ menu section and paste that Token you copied from Ubidots into the Device Token field.
-
Also, give your new FATBOX a name in ‘Device Name’ (no spaces or special characters and keep it within a reasonable string length e.g. 24 characters).
-
Choose ‘Enabled’ in the Enable client.
-
To save the changes made, make sure to press the UPDATE button.

4D. Access your data report on Ubidots
If everything has been setup correctly, your FATBOX will start sending the JSON sensor data that you have generated from Section 3 to Ubidots. You will also be able to see your new FATBOX G3 created and listed under your ‘Devices’ in your Ubidots account.
Note: This process will take from 3 to 4 minutes.

Click on your new device and you should see the latest sensor data sent from your FATBOX, e.g. if using our FATBOX G3 Ubidots IoT Starter Kit, you will similar data as following:

Click on the ‘data’ rectangular and you will see a chart and table of the data (Dots) just received from your FATBOX gateway.

CONGRATULATIONS! You have successfully set up your Industrial IoT Starter Kit, sent sensor data from your device to the cloud and visualised it in Ubidots.
5. Create Cloud-to-Device controls
The FATBOX G3 industrial IoT gateway can be configured to receive control messages from Ubidots (or other cloud back-ends) to control Modbus or CAN bus connected field devices like PLCs, motor inverters or EV chargers.
This demo application explains the sending of a settings from a Ubidots dashboard slider widget to simulate an industrial process control e.g. setting temperature of a A/C container.
The data is sent over 4G/3G/Ethernet, securely received by the IoT gateway and written to the Modbus registers of connected device e.g. a PID temperature controller or A/C unit.
5A. Send Modbus or CAN Bus control message from Ubidots to the G3 Gateway
Setup a new variable in your Ubidots “Device”, then assign that variable to a slider widget in your dashboard.

In your FATBOX G3 gateway, if the Ubidots C2D function has been enabled, the following process would be executed. In this case, Modbus register for ‘set_temperature’ for PLC.2 will be written to and updated.

CONGRATULATIONS! You have successfully set up your Industrial IoT Starter Kit, sent sensor data from your device to the cloud and visualised it in Ubidots, and set up cloud to device controls from your Ubidots dashboard back to your device! Much more can be done including data pre-processing at the Gateway - come talk to us!
Thank you and we look forward to working with your team!
Other articles that may interest you


A linux MQTT Gateway
Reduce the 3 costs associated with cloud data
Feedback & Control IoT applications
Cross compile your C codes
Got a question for us?
Contacts:
Tech Support : support@amplified.com.au
Sales : sales@amplified.com.au
Amplified Engineering